And Don't forget Draw, and save money, and live your crazy mom or teacher life!! This blog is kind of a modge podge of things I love- Education activities, Money saving, Mom stuff, crafts, and other arts integration into life kind of stuff.
Water/Sensory tables are popular these days with the little ones, but they can be pretty pricey. There are some ways you can make a water table with pvc pipes or wood and storage bins, or you can make a water table almost free with a few cardboard boxes, tape, and a shower liner. This water table may not be the most durable, and will probably only last one summer, but it is almost free and a lot easier to make than some of the other ways to make a water table.
Materials: Cardboard boxes, tape (Gorilla tape works best because it is stronger than the other kinds of tape), and a shower liner (you can buy a basic, cheap shower liner at the Dollar Store).
I stacked three boxes to make the size of table I wanted. If I had a taller box, that would have worked, but because I didn’t I used the boxes I had.
I taped the boxes together to make a good base. The top box and bottom box both had the flaps taped to the side for extra support and so when I taped the shower liner on the bottom I could tape into the box. You don’t want your bottom box to be flat on the bottom, or the water that runs to the ground might make it’s way to the cardboard. Then your whole water table will be ruined!
I taped the flaps down on the outside of the box on top, so they would not get in the way of the water. I taped the flaps inside the box on the bottom.
I put the liner over the boxes. Before taping the shower liner to the inside of the bottom box, I taped it to the inside of the top box by rolling the gorilla tape, as I did with when I taped the boxes together.
Then I made the liner nice and tight over the boxes, and taped it to the inside of the bottom box
That’s it! Easy and cheap!!
My toddler hasn’t stopped playing with it, since we put water in it!!
Sometimes using the Arts in teaching and learning does not have to be up and active! Sometimes working on a quiet activity is good for both the parent, teacher, and child/student. I created a quiet book for my toddler that uses art and colors, but also does activities based on songs and stories. This idea originally came from Love, Sweet. Love Blog, but has been adapted to use for centers at school. Age Level: Toddler to Primary grades Subjects: Anything. (The example quiet book is made for church, but a quiet book can be used for any subject being taught- reading, math, science, etc.). Materials: Binder, dry erase markers or crayons, sheet protectors (unless laminating everything), and activity sheets (I recommend making sheets on cardstock), sticker magnets. small zip lock bags Home Use: The quiet book is a perfect tool for parents to use with their individual children to work on things the child struggles with. I made mine for church, so my little boy would sit quietly during the main church meeting, and remember things I want him to remember about church- including songs. Classroom Use: The quiet book is perfect for centers. You only have to make enough for the amount of students in the center, and it can be used for any center subject. Idea behind the Quiet/Centers book: The idea is so students and children can work individually at their own pace by doing fun activities that reinforce a subject, story taught, or song learned. My sample quiet book mostly has activities in it from Primary children songs from church. It also has a coloring page from a scripture story. Children use dry erase markers or crayons to write on the sheet protectors to color the pages or do the activities. The markings wipe off easily, so other children could do the same activities, or if used for individual and reinforcement use, the individual child can do the activity multiple times until he/she is bored with it, or fully understands the concept. When new subjects, stories, and songs are learned, new activity sheets can be placed in the sheet protectors, and the old sheets can be stored for next years class or the next child.
The activities that do not involve dry erase markings use magnets to attach pieces to the activity sheet. To Make the Quiet book Binder is simple: The activity sheets will go in the sheet protectors which go in the binders. There are lots of ways to make activity sheets. You can get a bunch of free pintables from this website: http://www.1plus1plus1equals1.net/2011/03/tot-school-printables/
I also created some of my own activity sheets using Paint or searching for certain clipart. If using the quiet book for certain subjects, you can get lots of free pintables from teacher sites. I am giving you a free printable from one of my activity sheets to get started!
To make activity sheets using magnets, you will need the activity sheet and the pieces that will go on the sheet. I recommend laminating the small pieces so they will last longer. I used self sealing laminate sheets. After laminating your pieces, cut sticker magnets to the size of piece that will go on the sheet, and put the sticker magnet in the proper places on the sheet and on the pieces.
Sample Quiet Book:
Dry erase crayons go in the front pocket of the binder. (Markers or crayons can also be put in a zip lock bag that is whole punched and attached to the binder.
Activity sheet that use dry erase writing utensils:
Activities that use magnets to attach pieces to the activity sheet. The small pieces are stored in a small whole punched zip lock bag. Used one zip lock bag per activity page, so the small pieces don’t get all mixed up.
The activity pages can go in any order in the quiet book. The ones in this book are ordered with the dry erase activities first, the easier magnet activities second, and the harder magnet activities last.
A few things to note: The quiet books can also include pictures of what is being taught or reinforced, such as pictures of animals, letters, or even family members. This way little children will learn using visual arts before doing the activities.
If you need ideas or have questions on what to do with your quiet or centers books, let me know! I have lots of ideas!!!
What do you do after reading the book, 5 Little Pumpkins, with your toddler on a nice day? You paint a pumpkin, of course!! I guess you can paint one on a not so nice day, too, but being outside is always more fun than being inside to a toddler!
The pumpkin may not look like a masterpiece, but this was my little guy's first painting job ever, and he really enjoyed exploring the colors, learning about what he was painting on (a pumpkin), and having fun with mom.
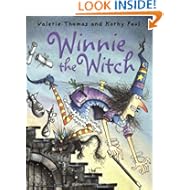
Description: This is a fun book
to use around Halloween time, but it is perfect for school because it doesn’t
discuss Halloween or even mention it.The book is about a witch who has a black cat, but always trips or sits
on the cat because it is black like the rest of her house and possessions.She changes the cat to green, but can’t see
the cat outside in the grass because it blends in, so she then turns the cat
several different colors.The cat is embarrassed,
so she turns it back to black, but changes the color of her house and
possessions so she can see the cat again.
Remember this is not a complete lesson.It is ideas on how to integrate the arts into Language Arts and other
subjects that have to do with the children’s book.Use and adapt as you like!
Lesson ideas:
HOOK: (Get
the students interested…) Put on a witches hat to read the story.
1.Art
integration/Colors: This is a fabulous book to integrate finger paints and colors with.After reading the book have the children
paint something!!You can be as specific
as you want (better for younger children) or let the children be creative and
paint what they want.The catch is- they
have to use the colors you tell them.For example, if you are working with preschoolers and teaching colors,
give them a coloring sheet, such as a house or something Halloweeny.Then you tell them a color, and they use
their fingers to paint that color on their picture.For older children, you could have them paint
on a blank canvas or piece of paper, but you still tell them the color they
have to use.They probably already know
their colors at this point, but it makes the art activity more involved and
fun, and allows the students to think more creatively and deeply as to how they
are going to paint their pictures using only certain colors at a time.
2.Drama
Integration Activity/Problem and Solution: This book is
great for teaching young children about problem and solution. This activity
would be best for 2nd graders, but can be adapted for younger
children.While reading the book,
discuss the problems the witch has.Discuss
how she solves her problems.After the
book, put the students in groups.Give
each group a problem.The group then has
to figure out a solution to the problem and act it out in front of the
class.Some possible Halloween problems
you can use are:
a.The little ghosts lost their mother ghost during their midnight walk.
b.The little girl wanted a big pumpkin, but they were all gone at the pumpkin
patch.
c.The kids went trick or treating, but their friend was sick and couldn’t
go with them.
d.The witch lost her hat while she was on her broom flying around the
city.
e.The little spiders’ web got washed away from the water, so they didn’t
have anywhere to live.
3.Art
Integration/Graphic Organizer/Problem and Solving: This
problem/solving activity is good for Kindergarten -1st grade.Before reading the book the children, create
a big chart with two columns.One side
will be the problems while the other side is the solutions.Make little pictures to go on your chart for
each problem/solution.The pictures you
will need are: black house, black cat, grass, green cat, tree, colored cat, and
colored house.As you read the story,
place the corresponding picture in the correct column.For example, the first problem is that the
black cat blends in with the black house, so put the black house on the problem
side with the black cat.As you read you
can move the pictures to the solution side or back to the problem side if they
become the next problem.(If you choose
you can make multiple pictures of the same things, and leave the current
picture in its original place so you don’t have to move the pictures).Now for the students’ activity: during small
groups- choose another simple problem/solution book for each group depending on
their reading level.Read the book
together, but this time the students will make a chart and color/draw little
pictures to represent the problems and the solutions.
You can use the following pictures (found on Bing images) or find your own. The blank cat is for the multicolored cat and needs to be colored after printed.
4.Music
Integration Activity/Colors/Science (Nature): There are lots of fun color songs.I found several YouTube videos with color
songs!Choose your favorite and teach
the kiddoes the song!You can show them
the YouTube video if you choose. The videos all have lots of colors displayed in
the video!
This video is great for pre-k. My toddler loved watching it, as well.
This video is good for learning to read the color words, or incorporating colors into nature. Plus, it has a pumpkin, so another added bonus to use during October or November.
This video is fun for Kindergarten age children reviewing their colors.
At
home Activity: Of course the above activities can be adapted to be at home activities,
but another idea that would be great at home is to find all of the colors in
your house to see if you have as many colors as Winnie does with her new
colored house.
If you have more school or at home
ideas to go with this book, please share!!
Special Post: Integrating the arts into Halloween
parties and fun
I love integrating arts activities with children’s
books, but I know there are ways to teach with the arts other than using a
children’s book. Every once in a while I will be posting a “special post.”It will not be centered on a children’s book;
it will be focused on something else- like a holiday or age group- and still have
arts integrating activities!This is the
first special post of the blog!
It is now October, and I know many teachers and
parents have begun thinking about school or family Halloween parties.If the teachers or parents haven’t, the kids
sure have!!It’s hard to ignore that
fact that once the leaves start changing colors- Halloween is on the minds of
little (and big) kids everywhere!Here
are some ideas/activities that incorporate the arts into your classroom or
family home parties.Some of these ideas
are more academic than others, and can actually be integrated into lessons
during the month of October.
Subjects: Writing, Music, Drama, Dance, Art
Music:
When
I was student teaching, I had the kids do a lip sink to a song of their group’s
choice.The kids had a chance to pick
the song, practice, and then perform.They had a ball.You could do
this for Halloween fun!Here is a list
of kid friendly Halloween songs that would be fun to karaoke or lip sink to:
1.The
Monster Mash
2.Spiderman
3.Ghostbusters
4.Ding
Dong the Witch is Dead
5.I
Want Candy
6.The
Witch Doctor
7.Thriller
8.Dem
Bones
Another
Music Activity: Music can be used for so many things during a
Halloween party because it is fun.Some activities
that involve music for Halloween parties are: (you may have heard of some of
these before)
1.Cake Walk:
Put numbers on the floor and have the students walk around in a circle while
the music is playing.When the music
stops, draw a number and whoever is standing on the number you drew wins a cake
or cupcake!!
2.Musical Chairs:
Put the same amount of chairs in a circle in the room as students- minus one
chair.While the music is playing, have
the students go around the chairs.When
the music stops, have the students sit in a chair.Whoever is not in a chair is out.Continue playing, but be sure to take a chair
out after each round so you always have one less chair than number of students.
3.Dance Moves:
Start the game
by having the kids write down random words on slips of papers. Put the papers
into a bowl and gather everyone into a standing circle. Pass the bowl around
and have everyone pull out a slip of paper. After they've read their paper,
turn on some music and pick one child to start the game. She'll come up with a
dance move using the word on her paper. For example, if she has the word
"kangaroo," she can use hopping as her dance move. Once she performs
the move for about 10 seconds, the person to her left comes up with a dance
move. This continues around the circle as everyone creates their own moves.
Once everyone has contributed, have the kids vote on the best dance move.This game came from ehow.com: http://www.ehow.com/list_6597778_music-party-games-kids.html#ixzz2gVYbegn9
4.Dancing Body Parts:This game would go well
with the song, “Dem Bones.” Gather the kids into a circle and stand somewhere
they can see you. After you put on some music, tell them they can only move the
body parts you instruct them to move as they dance to the music. For example,
start by only moving your pinkie finger, keeping the rest of your body
motionless. Invite the kids to mimic your movements; anyone who doesn't is
eliminated from the game. Make the movements more difficult as you go on, for
example, only move your stomach muscles, or combine two movements, such as
shrugging your shoulders while you tap your feet. The game ends when only one
player--the winner--remains in the game.This game idea came from ehow.com: http://www.ehow.com/list_6597778_music-party-games-kids.html#ixzz2gVZB4bTo
Art:
There are countless Halloween
Art projects out there, so I will only give you one idea that dives more into
creativity than just making a cute cat hanging for the wall.One reason kids (and adults) love Halloween
is because they get to where costumes.Some schools don’t allow costumes. This activity can be done with or
without costumes.Before the party, take
a picture of each child’s face.Make the
picture actual size of the face and print it as a dark watermark.Then have the students choose their favorite
animal. The activity is to have the student’s create the face of that animal on
their own face picture using paint.This
would be a good chance to incorporate an art lesson on combining colors,
texture of paint, etc.
Dance:
One
year when I was in college I was in a show choir and we put on a Halloween
performance for a big Halloween party.We actually sang and danced to the songs we were singing, and it was a
live performance, but an idea like this can be incorporated on a much smaller
scale for a classroom party.Throughout
the month of October you could teach the students a Halloween dance, such as “Thiller,”
by Michael Jackson.If you don’t know
how to do the dance, here is an instructional video that gives you step by step
moves on how to do it: http://www.youtube.com/watch?v=XFEu2vd0nPk
During your classroom Halloween party, have
the students perform the song for their parents, other students, or the
school.Obviously, “Thriller” is for
older students, but this idea/activity can be done in younger grades with other
songs.You could even make up a dance to
“5 Little Pumpkins,” if you wanted to!!
Writing/Technology-Media
Art/Drama: For a writing integrated activity, you could have the students as groups write
a Halloween radio show using sound effects.The students would write a “story” to share on the classroom radio as if
it was the 50s and they have to make all of their sound effects
themselves.After writing the story with
sound effects and different voices for the characters, you could have them
record their radio stories on a device (tape, mp3, or whatever technology you
have) and play each story to the class as if they were listening to the
radio.If you don’t want to have the
students record their radio stories, you could put up a sheet in front of the
classroom so the audience cannot see the performing group.The group who is sharing their story goes
behind the sheet with all of their sound effects and reads the story making the
sound effects as if they were live on the radio in the 50s.There are “spooky sounds” and Halloween side
effect cds and audio files on the internet if you want to allow your students
to use pre-recorded sounds. (This idea is not my original idea.It was something we did when I was taking the
Arts Academy through BYU while teaching).
If
you have more ideas on how to integrate the arts into classroom or at home
Halloween parties, please feel free to comment with those ideas!!Thanks for sharing!
Subjects:
Language Arts, Media Art/Technology (photography), art, science
Objectives: Rhyming, poetry, sequencing, comprehension,
creativity, fluency, human body
Grade(s): Any Grade
Possible Materials
Needed: Camera, writing utensils, computers, chalk, or other materials.
Brief
Description: Parts is a poem in a book.Therefore, you can use this book for teaching poetry and/or
rhyming.It is also a great book to get
older students/children out of their comfort zone, and present the book as if
they were the little boy “loosing” his parts (see Drama Integration Activity).
Lesson:
1.HOOK:
(Get the students interested). Begin by reading the book in a dramatic way to
the students (even older students).Read
it as if you were the main character.Most likely students will think you are funny!
Choose
one or more from the following activities:
2.Media Art/Technology
Activity:
This activity can be done as a whole class, in groups, or as individual
projects for older kids.It can be
incorporated when teaching sequencing, creativity, comprehension, or many other
things depending on how you use it.The
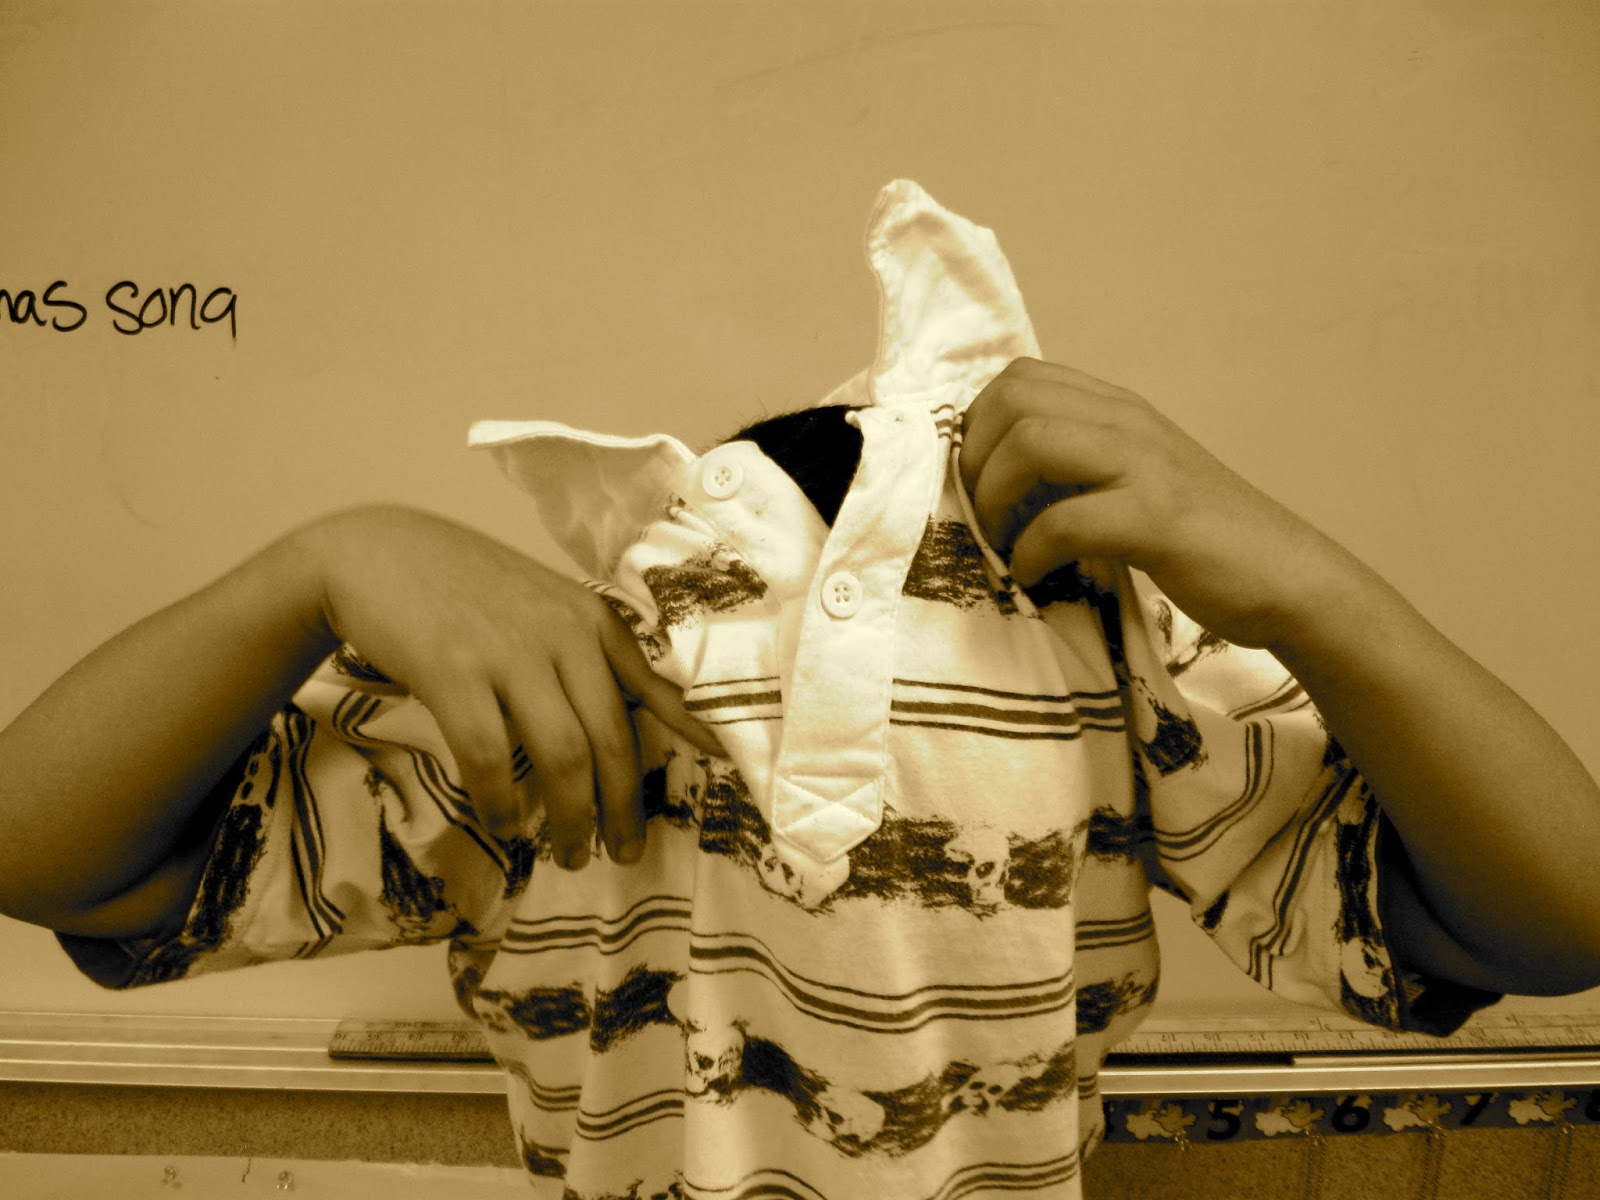
activity: for each page of the book, take a creative picture of what the page
is saying.For example: On the second
page the main character’s hair falls out in his comb.You or your students depending on how you set
the activity up-take a picture of someone holding a comb with hair in it.After all the pictures are taken, you can
have the kids put them in order for a sequencing activity.If you did groups, you could have the
students present their group media arts project about the book with the
pictures.There is a lot you could do
with the pictures.
I
actually did this activity with my class when I was teaching 3rd
grade.We did it to feature this book
because it is one of my favorite books, and it is the book my students voted for
to feature.We did this as a class, and
students took turns being in the pictures.(I took the pictures).When we
were all done, we put the pictures on our classroom door, with a sign that
said- “Can you guess the book?”The
students loved it, and it made them more excited to read other books.Here are some of the examples of pictures I
took.(The kids were creative, and they
chose what to do for the picture).
3.Drama Integration
Activity:
If you chose to use the “hook” for this book, this activity is exactly that,
but it is what students will do and present.You can use this book as an introduction/example, and have the students
choose their own books, or you can have students read this book to the class,
you, or in a group.The Activity: have
students read the book in a dramatic way- as if they were the little boy
missing his hair, brain, etc.This is a
good way to help with fluency.
4.Art/Writing
Integration:
After using this book to teach poetry, have the children write and illustrate
their own poem.You can have younger
children use writing utensils, or have older children create their graphics using
technology: photography, a program like Paint, or other graphics.
5.Science Integration
Activity: This
is a perfect book to use when teaching about our bodies to little kids.The book has reference to skin, bones, boogers,
body parts (eyes and arm), teeth, and ear wax.You could focus on any one of these things or all of them when introducing
a unit on the body.Some Art integration
activities when using this book to teach the body is: self-portraits, skeleton
bodies, or go outside with chalk and trace students’ bodies.Let them draw their own face and clothes.
At Home Ideas: Any of the above
ideas can easily be done at home with a little adaptation.Some may even be easier to do at home than in
a classroom.
Grade(s): 2-4th,
but can be adapted to other grades
Description: Mosterlicious is a book about a little boy who can’t seem to
make any food recipe right.His father
owns a nice restaurant, and when he goes out of town leaves his son, Bingle in
charge.Bingle makes crazy recipes,
which scares away the human guests, but is perfect for the new guests- the
Monsters.It is a fun book, and I used
it to teach comprehension when I was teaching 3rd grade.
Remember this is not a complete lesson.It is ideas on how to integrate the arts into Language Arts and other
subjects that have to do with the children’s book.Use and adapt as you like!
Lesson:
1.HOOK: (Get
the students interested…) A great idea to get the students interested is to
make a funny creative food recipe using nasty ingredients, like a shoe, sticks,
spiders (fake of course), and dog food.Make the concoction in front of the students, and then offer it to them
to eat!!
2.Read the book!(The Drama
Integration Activity requires you to read the book while doing the
activity.See below for details).
1.Another
HOOK idea: While the children are away from the classroom, set up a “Bangdoodle Restaurant.”Pretend to be the server, and serve some weird
looking food.You choose if you want it
to be edible or not, and if you want the children to actually eat it.You can use your “fake” restaurant as your
setting for the story.(You can also use
this idea when teaching about setting).
Choose
one or more from the following activities:
3.Drama
Integration Activity: Have the children sit in a big circle with lots of space in the
middle.As you read the book, you will
basically have the children act it out.For each character you pick a student to come to the center to be that character.As you read the story, you tell the student
what to do.Basically, the student does
what you say as you read.Make
sense?For example- on the 3rd
page of the book, Bingle’s father talks to him about being nervous and
unhappy.After you have two students in
the center (on the stage)- one being Bingle and one being his father- then tell
the student who is Beingle’s father to say- “I am a nervous and unhappy person,
and I need a vacation…” The student can repeat the words you tell him to
repeat.In the book the father shakes
his head and lets out a big sigh.Tell
the student who is playing the father to do just that.Continue doing this throughout the book
adding new characters.This makes the
story long, but it is so fun for the kids, and a great way to teach
comprehension and /or sequence.Of
course, when you are done with the book or during the activity, you can ask
questions to assess if the students are comprehending.I did this with my 3rd grade
students.They loved it.At first they were hesitant to “act” out the
parts, but by the end of the book they really had a great time, and were able
to answer all of my questions!
4.Drama/Writing
Integration Activity: This activity especially works well if you did the previous Drama
integrated activity.It can still work
if you didn’t do the previous activity, but it may take some preparation in
getting the kids to act out the characters.For this activity, you put the students in groups, and have them rewrite
the ending of the book.Give them
guidelines, such as Bingle’s father doesn’t return, or Bingle’s father is not
happy with what he did to the restaurant. Then, after the students perfect
their rewritten ending, have them act it out in front of the class.
5.Art
Integration Activity: After
reading the book, have your students design a monster.You can use any element (colored pencils, paint,
markers, etc) that you want to have your students design with.To integrate writing, have the students write
about their monster.Depending on the
grade level, you could have them write a character analysis, a story, or just
sentences like, “My monster’s name is _________., and “My monster’s favorite color is
______________,”
At
home Activity: A great activity at home for this book is to create a funny, crazy
recipe.You can do it as a family, or
have a competition to see who can create the weirdest food that tastes the best.After the food creations have been made, have
a fun family Monster restaurant, and take turns serving each other the crazy
food.